
|
In this Image masking tutorial, we are presenting the universal way to do photo masking in Adobe Photoshop. Image masking is applied to correction every portion on an image in a specific colour. It is well known as changing the background, with accurate pixels without any blur. There are a few types of masking such as hair masking, fur mask, shadow mask etc. In comparison, you can apply it with different layers. This digital era, eCommerce company grabs the whole internet market. Day to day image editing services improve the eCommerce services and sells rate. There is a tremendous advantage of its professionally growing business. Photo editing is essential for eCommerce, indeed. For image editing, we are mentioned a few software and in this content, let's check out the primary tool in Photoshop.  1. How to Do Image Masking in PhotoshopPhotoshop masking technique is used to remove background especially for hair, fur, etc. There are several masking processes apply in Photoshop. Here, one of the image masking operations is discussed. We mentioned how to run Photoshop software in our clipping path tutorial, so we are escaping that part here. Open a model image that has hair where you can do masking. Go to File Menu to open. You should have a clear understanding that when we should follow Photoshop Masking technique because clipping path and image masking both applies to remove the background. We will only do Photoshop Masking when an image has hair, fur, wool, etc. while doing clipping path is not possible using Pen tool manually. Steps: Initially, we do clipping around the body and the dark hair area until the background is invisible throughout the hair part. After that make a copy of the original background layer thereby, the main image will be untouched. Select the original background image and go to Layer palette in the second right site icon and click. We created another duplicate layer. See the screenshot. 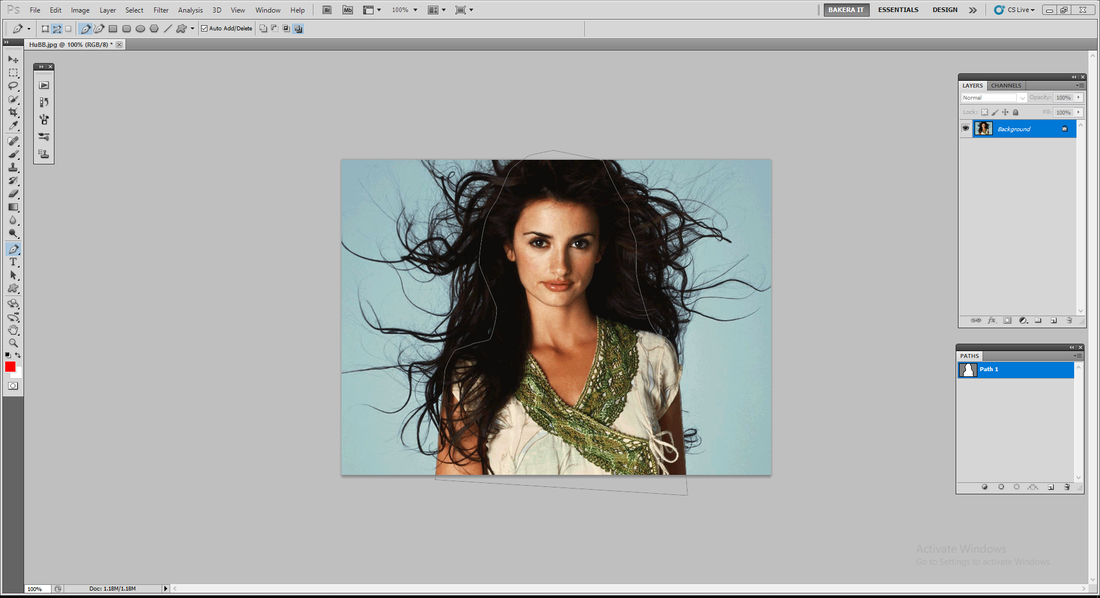 Now, select the path and inverse the selection. You will see both path area and the order are selected. You need to click on eyedropper tool, or you can select it by pressing control or Command+I on the keyboard. Choose the background area which you want to remove and then select the eraser tool in the second option of eraser palette. You need to click on the selection area and drag every corner. You have to continue erasing the background all over the background. The image will look like the screenshot background. 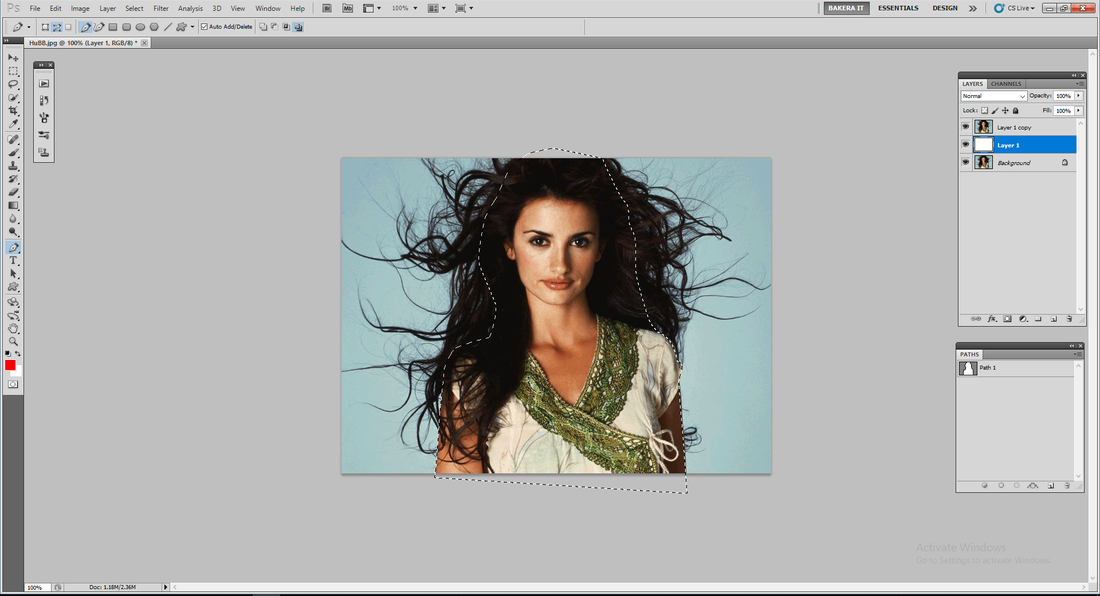 Finally, you can save the file as in transparent background for future use on a different color background. 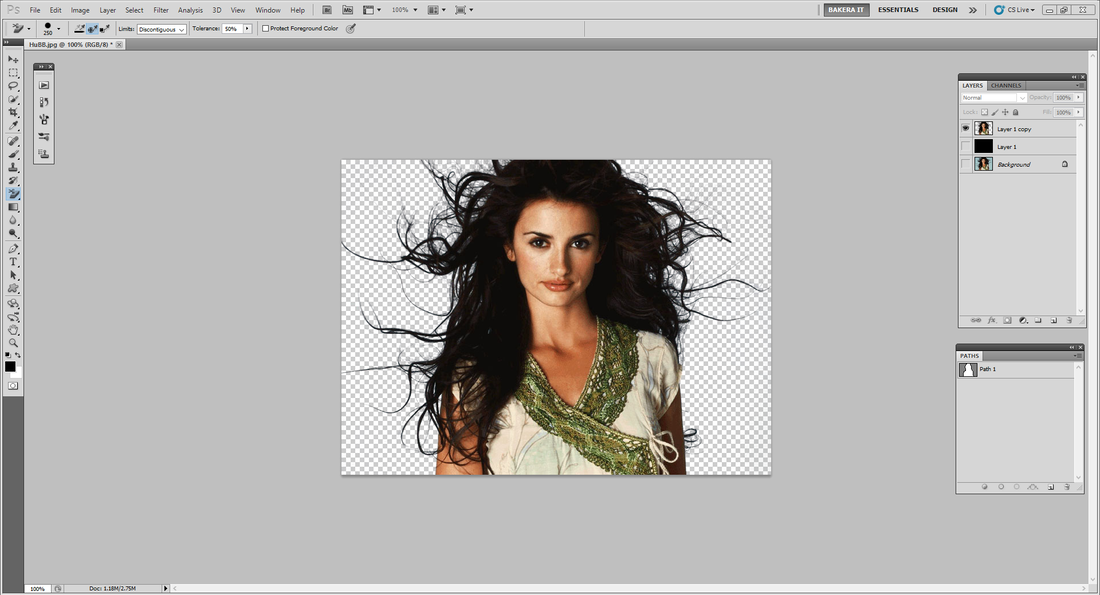 This Photoshop model masking method is a one of the masking technique we use. Recently many components of Photoshop software are using for mask out the image, but Photoshop masking is still unbeatable because It provides the best quality for model masking. If you have any question regarding our masking tutorial or other clipping mask, image retouching, image manipulation, image editing, shading, mirror effect or other Photoshop services, please feel free to Contact Us.
0 Comments
Your comment will be posted after it is approved.
Leave a Reply. |
