
|
In this Image masking tutorial, we are presenting the universal way to do photo masking in Adobe Photoshop. Image masking is applied to correction every portion on an image in a specific colour. It is well known as changing the background, with accurate pixels without any blur. There are a few types of masking such as hair masking, fur mask, shadow mask etc. In comparison, you can apply it with different layers. This digital era, eCommerce company grabs the whole internet market. Day to day image editing services improve the eCommerce services and sells rate. There is a tremendous advantage of its professionally growing business. Photo editing is essential for eCommerce, indeed. For image editing, we are mentioned a few software and in this content, let's check out the primary tool in Photoshop.  1. How to Do Image Masking in PhotoshopPhotoshop masking technique is used to remove background especially for hair, fur, etc. There are several masking processes apply in Photoshop. Here, one of the image masking operations is discussed. We mentioned how to run Photoshop software in our clipping path tutorial, so we are escaping that part here. Open a model image that has hair where you can do masking. Go to File Menu to open. You should have a clear understanding that when we should follow Photoshop Masking technique because clipping path and image masking both applies to remove the background. We will only do Photoshop Masking when an image has hair, fur, wool, etc. while doing clipping path is not possible using Pen tool manually. Steps: Initially, we do clipping around the body and the dark hair area until the background is invisible throughout the hair part. After that make a copy of the original background layer thereby, the main image will be untouched. Select the original background image and go to Layer palette in the second right site icon and click. We created another duplicate layer. See the screenshot. 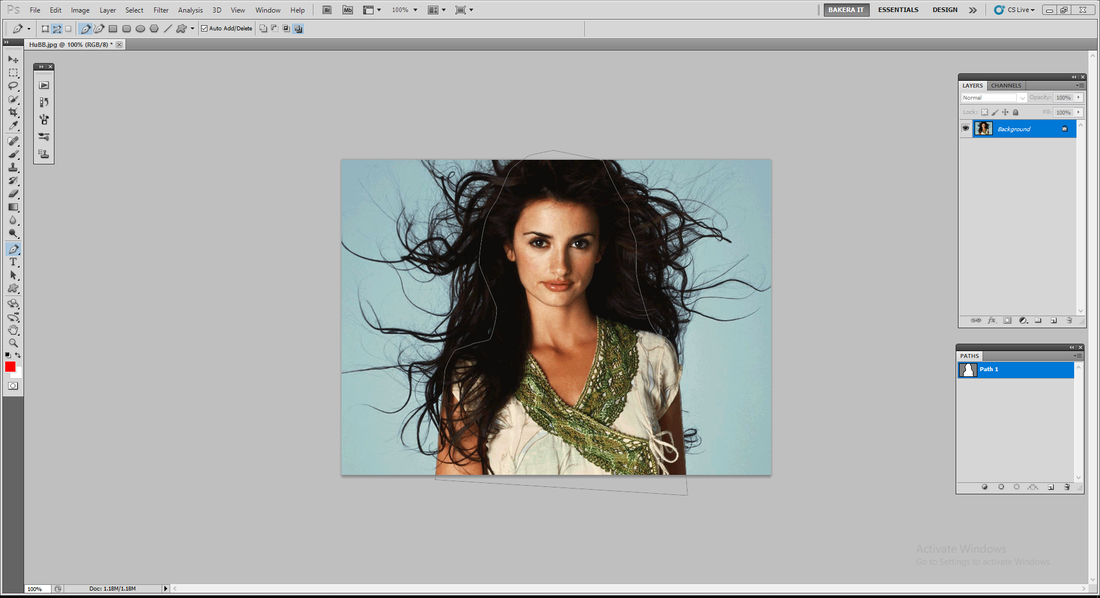 Now, select the path and inverse the selection. You will see both path area and the order are selected. You need to click on eyedropper tool, or you can select it by pressing control or Command+I on the keyboard. Choose the background area which you want to remove and then select the eraser tool in the second option of eraser palette. You need to click on the selection area and drag every corner. You have to continue erasing the background all over the background. The image will look like the screenshot background. 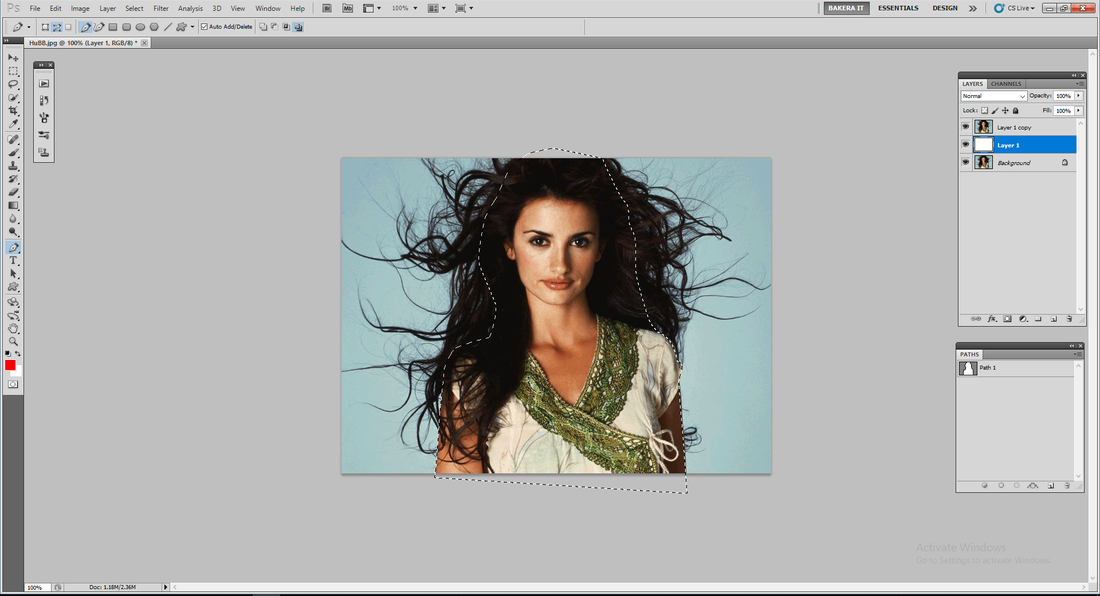 Finally, you can save the file as in transparent background for future use on a different color background. 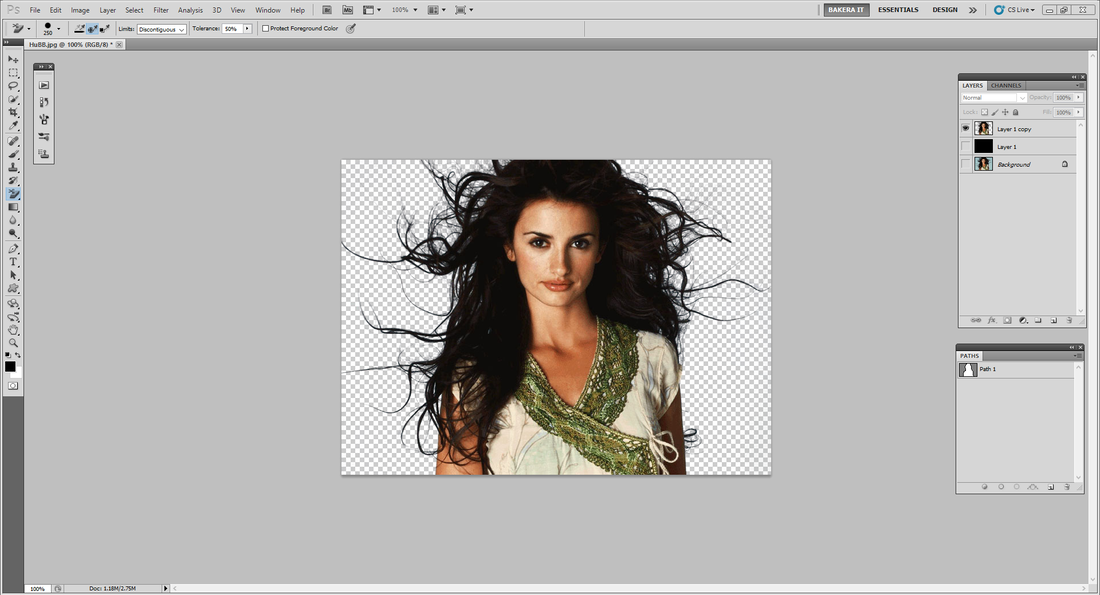 This Photoshop model masking method is a one of the masking technique we use. Recently many components of Photoshop software are using for mask out the image, but Photoshop masking is still unbeatable because It provides the best quality for model masking. If you have any question regarding our masking tutorial or other clipping mask, image retouching, image manipulation, image editing, shading, mirror effect or other Photoshop services, please feel free to Contact Us.
0 Comments
Do you frequently wonder how to create a clipping path in Photoshop easily? If so, here’s the perfect answer to your question. Clipping paths are usually made into a closed vector path or an individual shape by software’s such as Adobe Photoshop and Illustrator. Manipulating, changing or removing the background from an image are some basic clipping path purposes to be carried out by professionals. Using the clipping path method to manipulate an image, for example removing a background of one image and replacing the object from there to another background is very effective to make the image look attractive. As effective as this method is, it needs to be carried out by professional designers. One of the very common software used for clipping path technique is photoshop. It is simple and easier to be a little smooth when photoshop is used for this background removal process. Table of Contents
Here are the steps on how to create a clipping path in photoshop.Step 1: Upload your Image after launching Adobe Photoshop After you successfully open photoshop, go to File > Open. Browse through your photos and upload the image that you want to edit. Step 2: From the main toolbar, select the pen tool Go to the main toolbar, on the left as shown in the image below, and select the pen tool. To bring accurate results from a pen tool, a good amount of practice is required. Step 3: Select a new path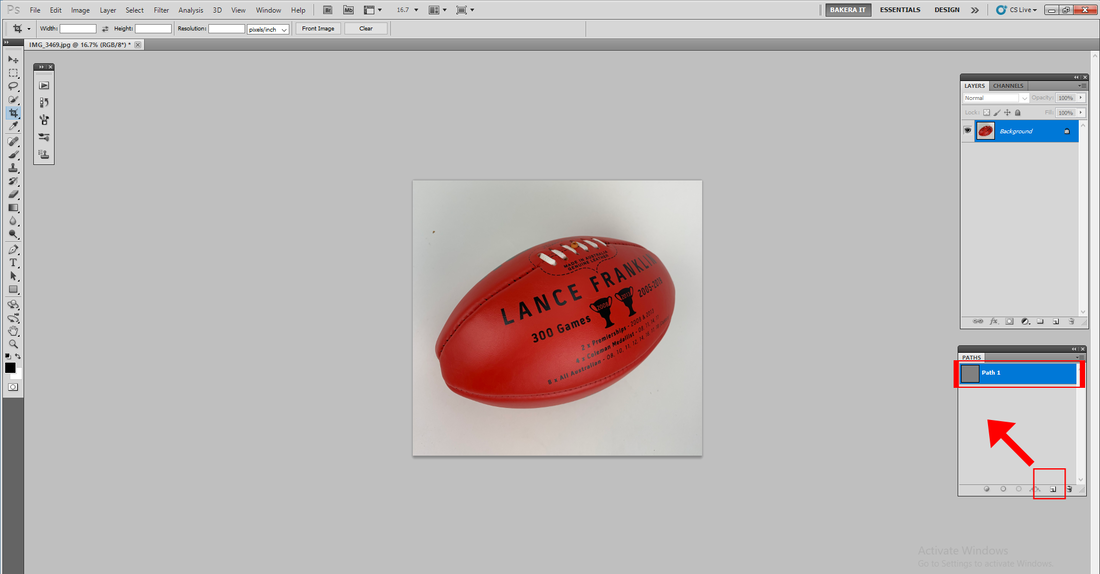 For creating clipping of the image, select a new path as shown in the image below. If you cannot find the path option automatically, you can go to windows from the above menu and select path. Step 4: Start to draw the exact shape of the image that you have uploaded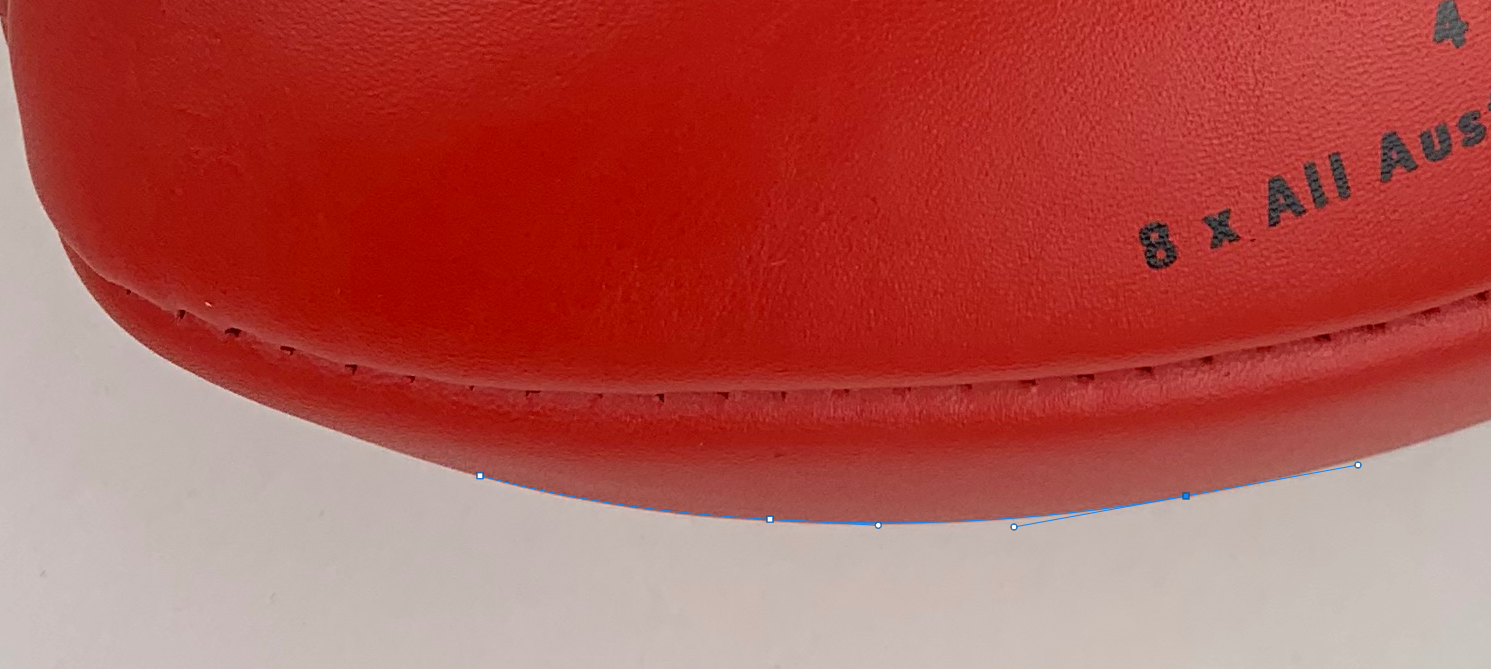 Step 5: Draw a clipping path around your product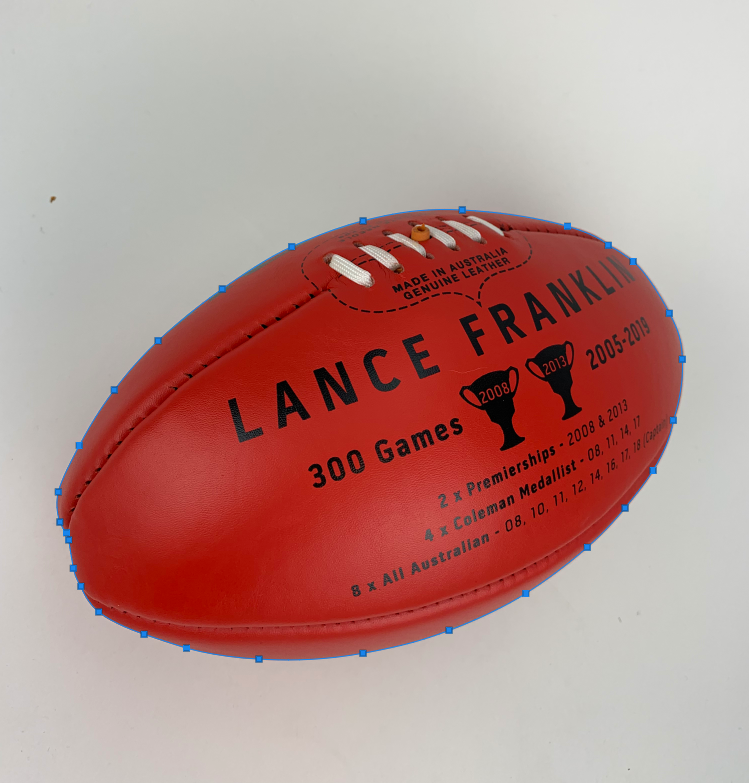 Make sure that the path is done accurately and spending on the shape of the object time taken to draw a clipping path might vary. Step 6: Use ‘Ctrl + Enter’ for selection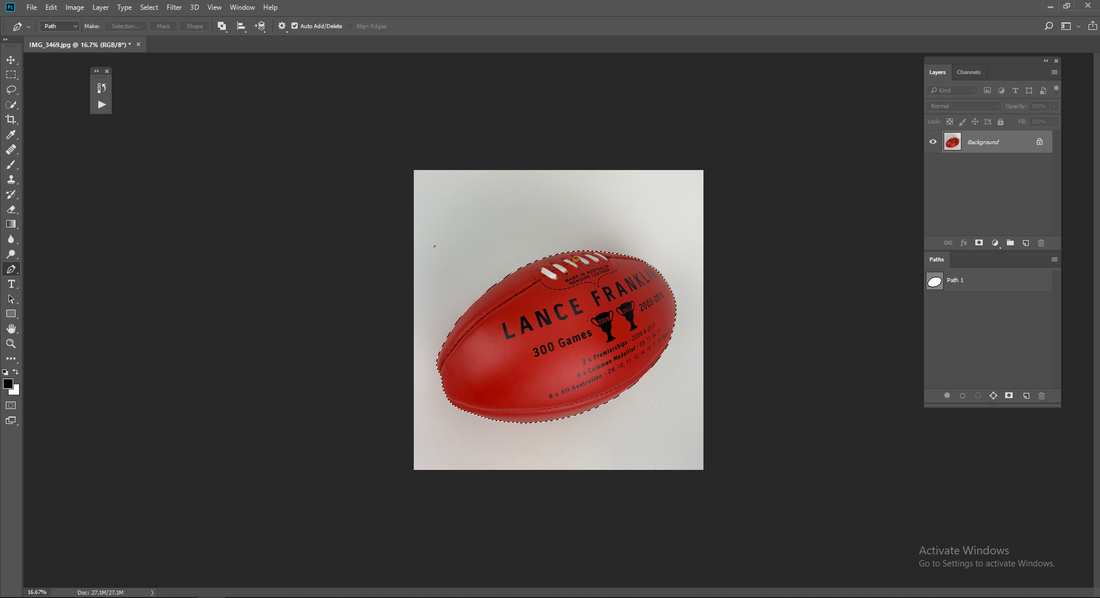 For selecting the clipping path that you have created use the shortcut ‘Ctrl + Enter’ Step 7: Make a copy of the background layer and mask the copy layer. Select a solid color layer in the medial position.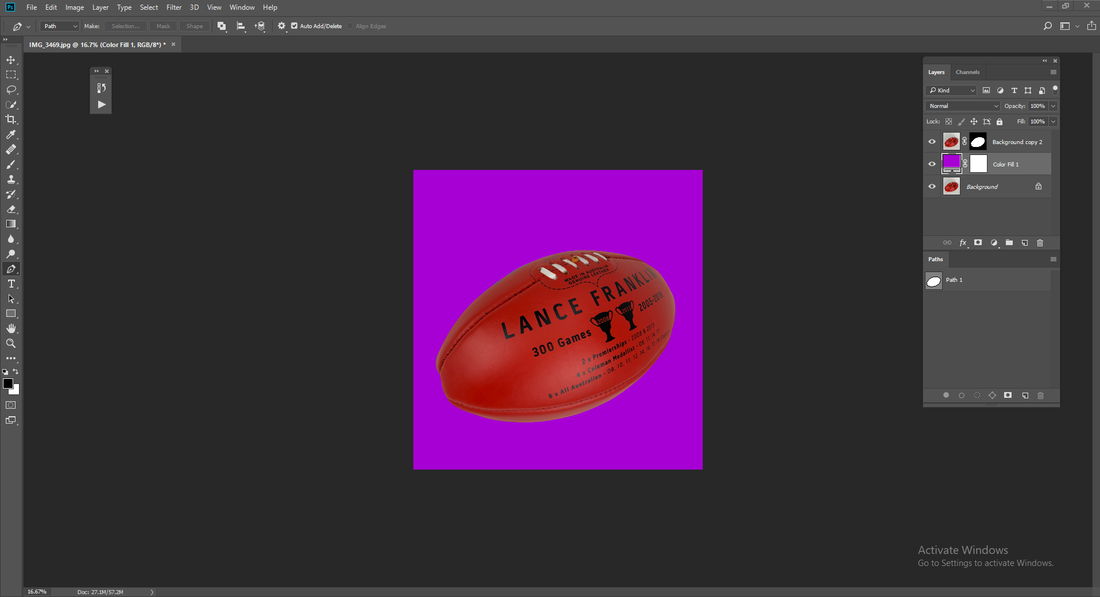 Why Clipping Path is Important?In the present days clipping path service has been in high demand due to increasing number of online businesses, advertisement of different products to make it look appealing to the customer’s eyes. Clipping path definitely helps to draw attention to the products that have been displayed on the website, giving the buyer a preference to purchase the product. Large companies such as Amazon, eBay, Walmart and other e-commerce businesses, rely highly upon clipping path services for their product images to look attractive and make an impact on the buyer as customers choose their products by looking into the picture of the product that has been provided by the seller. Clipping path services are in high demand for different industries. Industries and types of companies that use clipping path services for their products are fashion industry, electronic companies, toy companies, jewellery businesses, marketing companies, architecture and interior design businesses and more. Apart from them, clipping paths holds a wider range of reason and purpose to serve. Clipping path is used in different graphical design, web image optimization, banner designing and other designing works. Every designing expert needs to create a clipping path for their work as it is a part of their day to day work. Isolating certain parts of an image, removing background and more, clipping path is widely used for different purposes. It is a very essential part in designing and therefore, doing the job from a professional is a wise decision. Clipping path needs to be absolutely accurate to make your image look good and therefore, experts are the number one choice recommended. Try Bakera IT for free |
